This easy but flavorful Instant Pot Chicken Cacciatore is a fast and delicious meal any time of the year, and it's paleo, Whole30, and keto-friendly! Find the full recipe:
You'll forget This Sweet and Sour Chicken is paleo when you put the first bite into your mouth, but you wont get any of the gluten, MSG or any of the bad polyunsaturated fats that you'll get from the Chinese restaurant!
hi guys I'm so excited to show you a sneak peek at the brand new dashboard that 20 dishes is launching for their members this is going to be launching in the very near future probably in the next few days to a week at the most we're really really excited about it because it is going to make managing your weekly meal plans your prep list your shopping list and everything so much easier so essentially you're going to have your own custom dashboards so when you log in you're going to see your pretty little dashboard with your menu your step-by-step prep your shopping list and your options over here so the cool thing about this plan on how this is laid out here is you can do a lot of adjusting you can add recipes you can add notes to your days and really customize what you want for your meal plan for the week so say you wanted to use this recipe for the crock pot roast and you want to actually do that on Wednesday you would just write it down throw it on Wednesday and it moves it down there say you wanted to come over here and you want to maybe add a new recipe in or add a note so you would just click on this little plus sign here and it's going to bring up the recipe section say you wanted to add maple chili chicken to that day you would just click on the plus sign to throw that into your menu so we'll just do that for a quick example and boom there you've got maple chicken chili and then say you want to make a note you would click on the plus sign again and go over here to add notes and say you wanted to make extra for leftovers you would just type in whatever your notes need to be here it could be pull the chicken out of the freezer or make extra for guests that I whatever your notes need to be you're going to click the add notes and that's going to put that in that day so you could go through and really customize your meal plan for the entire week so that you're organized everything is streamlined and it's going to save you a lot of time so we also have this step-by-step instructions which we have provided for all of the menus that 20 dishes creates but that's going to be on this own tab now and all of this stuff your meal plan your prep step-by-step prep your shopping list everything is printable with this print icon so you can just click on the printer and it'll print everything out all nice and pretty so you have your step-by-step instructions going to have your shopping list which is really cool too because we've added some features here where say you need to get four avocados that week maybe for some other recipes or just for snacks you would just type in the little boxes there and you can add whatever you need to add so you can go through here and really customize your shopping list so that you don't forget anything at the store because there's nothing more frustrating than going shopping getting the stuff for the week getting home and realizing that you've left a few things at the store that you completely forgot to get I hate doing that so you can go through here and customize anything that's on the pre-made shopping list and then if you have some stuff that's not on the list you can also add in your additional items here and all of this will print out whenever you print it off a little print icon and the last thing that's really cool is this option section so you can go through here and you can set the recipes say you have a really big family and you need all of the servings for our or you need all of the recipes to come out to 10 servings for every recipe you can easily adjust that or if you're a small family or maybe just cooking for yourself you can alter that down to you know just one or two or three servings so this is a really cool feature on also you have the ability here to choose which menus you see in your meal plan area so you can choose to see the paleo the AIP or the fodmap meal plans so that's another really cool feature that's going to help you really streamline your meal planning experience our whole goal with 20 dishes is to get you in and out of the kitchen as fast as possible so I can't wait for the sash board to roll out for all of our members it's going to be really really soon and I know it's going to make your life so much easier if you have any questions make sure you leave me a comment down below and let me know or you can always shoot me an email I would be happy to answer all of your questions but I'm super excited about this and I hope you are too I will talk to you again soon .
Video Description:
Following the paleo diet? Feeling frustrated with all the meal planning and prep on the paleo diet?
Trust me, I know how much time it take to prepare all this food from scratch. That is why I LOVE 20 Dishes where you can learn how to prep a week of meals in 60 minutes.
It's time to spend MORE time living and LESS time slaving in the kitchen!
In this video, I go through the few short steps to making a homemade paleo chicken korma curry. It is a fantastic dish that is packed full of flavor. This recipe is undoubtedly a must-try for any curry lover.
Full Recipe:
The standard recipe will feed about 4 people, but if you’re looking to bulk it out a bit, then adding some vegetables is a great way to achieve this. Just keep in mind vegetables like carrots and sweet potatoes will require extra cooking time.
If you want the full list of ingredients for this curry, then you can find it below.
1 Tbsp coconut oil 1 onion, diced 1 Tbsp ginger, crushed 2 tsp garlic, crushed 1 Tbsp tomato paste 500g (1.1 lb) chicken breasts, cubed ½ Tbsp chili ¼ cup ground almonds 400ml (13.5 oz) can coconut cream ½ Cup Chicken Stock
There are many reasons why you should make a curry paste from scratch, but the main reason is so you know what has gone into it. Many supermarket brands have a lot of additives in them to help extend shelf life, improve flavor, and more. The downside is these additives are typically not paleo-friendly and can do you more harm than good.
Cauliflower rice is the perfect side to go with this dish. It is light and well worth putting the extra time in to make. One thing I love about cauliflower rice is that it doesn’t tend to make you bloated like regular white rice.
If you’re looking for a side to go with this dish, then something like the easy cauliflower rice is perfect. It’s very much like rice but instead is incredibly light and won’t leave you feeling bloated.
I hope that his paleo chicken korma curry turns out as awesome as it did for me. If you have any feedback, tips, or anything else that you would like to share, then please don’t hesitate to leave a comment below.
In this video, I make a delicious paleo sweet and sour chicken. It requires a little bit of work, but the end result is totally worth it.
Recipe:
You can make this dish a lot easier by merely not coating the chicken. This will save in time and make the recipe quite a bit healthier. The downside is that you won’t end up with lovely crispy chicken.
One of the best things about this dish is how well it is the next day. You can quickly reheat it in either a frypan or microwave. Both will work just fine, but the frypan is the way to go if you don’t like using microwaves.
This dish is great by itself, but if you are looking for something to go with it, then you should try coconut rice. It’s super easy to make, and the end result is incredibly tasty.
If you need a list of ingredients for this paleo-friendly sweet and sour chicken, then you can find all you need to know right below.
440g (15 ½ Oz) can Pineapple Pieces with unsweetened juice (Don’t drain) 1 onion, quartered 1 tsp ginger, minced 1 large red bell pepper, chopped 3 Tbsp honey 4 Tbsp tomato Paste 2 Tbsp coconut Aminos ¼ cup apple cider vinegar 500g (1.5 lb) chicken thigh, cubed 2 eggs 1 cup tapioca starch 1 tsp salt ½ tsp pepper
Coconut aminos are pretty important, so if you're able to pick it up, you will be glad you did. It's just a soy alternative since soy sauce is not allowed on the paleo diet.
You might think this dish is a bit light in vegetables if this the case, then feel free to add more. There are quite a few different vegetables you can add, such as carrots, bok choy, and much more.
That’s all I really have to say for this paleo sweet and sour chicken recipe. I really hope that it works out to be as great as it was for me. If you have some tips, suggestions or something else that you would like to mention, then please don’t hesitate to leave a comment below.
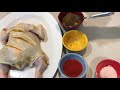
hey what's up y'all I'll make a fried chicken but it's looting free how could that be tasty let me show you what's up let's get started alright so it's real simple it's real quick I have tenderloins chicken tenderloins makes it easier for the cut I'm gonna make more like a chicken nugget cuz it's quicker a little more crispy ER and you know it's all about that quick shot in the kitchen right when you ain't got the time you got to hook it up make it quick all right so I'm gonna chop up this chicken real fast and then you know wow you're chopping the chicken you could have your oil heating up I use an avocado oil because then you can get it really hot without burning the oil it's a good fat now normally they say don't fry stuff you know if you do whatever so once in a while give the IE but again do what you feel best fits you but this is more of a healthier version of fried chicken but it's still tasty I will stand with cutting this chicken alright cool so now what I'm gonna do is I'm gonna put it in my ball now next step out my seasoning I'm gonna wash my hands and I'll show you the next step all right so now I'm gonna season my meat now I'm all about the seasonings you just want to be a little careful with the salt because you don't want it too salty and that will take away from the flame temp so I add oregano kind of a garlic herb mix with no salt again I I get crazy with the seasoning that's all seasoning right and it doesn't hurt to get it off flavorful so seasoned up my meat I'm gonna add my egg to it okay now all right good look extra strong but it whoo all right so you not get a little dirty with it but I'm gonna add some of the seasoning to my flour as well cuz again it's all about that flavor right who wants more on food no I don't so something my mother used to always do she would fry up chicken and chick cold chicken is good right so anytime you have some chicken you can always put it to the side just let it breathe so the Chris penis is still there you can always reheat it in the oven so that's really good the Nuggets the meat is already cooked really well so if you go to reheat it and be mindful because you don't want to really dry it out and that's just something to be careful about but other than that it's just really delicious and tasty so I'm gonna get a little dirty with it I'm gonna mix it now this hand is clean cuz I'm gonna put the oil in my pan but I'm letting it heat up so as it's heating up I'm doing my mixture and the egg is what's gonna allow the flour to adhere to the meat and it gives it more of a little bit more of a body and I do my chicken strips with the egg but if I do bone-in type of meat with the skin I normally don't add egg you just add the flour you could do a web edit but that'll be another time all right cool that's mixed let me add my oil now I'm gonna do an avocado oil the see how much skill I got I have my oil the pan is hot now these are Nuggets right so we're gonna turn them only once what's up with that oil get hot remember you want the oil hot before you add the meat because once you add the meat inside it's gonna bring the temperature down a little bit and it'll prevent it from getting a good crisp if it gets down to low and then you're gonna be sitting there and then absorb the oil so the hotter it is the more crisp the meat gets and the less absorption is gonna take not at least that's what I was raised to believe I don't know if it's true any scientist out there go ahead and research that but first would I know make sure it's hot get a good crisp and then is what you want to do all right I think it's ready so I'm gonna go ahead I have my flour mixture right here and it's really tapioca flour which is a gluten free so it's a little bit of a different texture now that's now ready yep no worries don't stress I'm gonna go ahead and let it kick it there once you see the flour kind of bubbling and getting a little bit more yeah just a bubbling around it you know that tells you is getting hotter and then you can add the rest but again don't keep adding it cuz we don't we want the temperature to go up all right so now I'm gonna go ahead and I'm gonna put it in the oil my kids actually love this chicken remember y'all you're gonna flip it once so you want to be strategic on the way you lay it in the pan got room in there we don't want to overcrowd it as well same concept as allowing ventilation that happens so around the chicken can evenly cooked get all nice and crispy also it doesn't bring the temperature down too crazy and kind of keep it nice and out of temperature that it will get crispy for you we're kind of pushing it to the side if you need a little bit of room you know it's not really touchy or should I want even though term but spit it in there give it some room around it alright cool that's plenty for now let it kick it when you start seeing the end around the edges get brown that's when you want to go ahead and flip it now if you're not too sure what you're looking at no worries go ahead and just gently you know I can get some tongs and go ahead and just check it out and see you know lift it a little bit and see if it's kind of browning on that side and then just place it right back in the same spot okay all right cool so we don't let that kick it fry it and then I'm going to show you the beautiful presentation when it's bent so remember y'all make the listening white-looking this won't take but a few seconds to get it on that side more like a shallow fry elicit now a lot of times I'll have this with for the right stuff in I'll do that in another video delicious red beans and rice with a good salad some greens kale the delicious kale recipe with smoked turkey legs delicious anyway kids will love it a good little quick shot is ready taking these out the hosts are gonna pick this out absorb some of that oil delicious right now the tapioca flour doesn't get crazy dark like normal flour says when you when you find a chicken you would think so this is completely cooked nice and crispy got a pretty color to it am I looking a little young but as good as just write that on your paper setups or excess oil I'm go ahead and give him a little extra flip and then how pretty that is that's what I'm talking about yeah okay so I'm gonna plate this up and a lot of times you know some of my kids I'll have some chicken with some ketchup and I found this ketchup because a lot of times I don't want to make it myself so I found this really cool ketchup at sprouts I ain't really you know sponsored by them but it's all good this right here is the business so if you can get ahold of that it's delicious it's an on-suite and add some Louisiana Hot Sauce a Red Rooster to it is bomb all right so here's that delicious fried chicken now remember don't forget to subscribe I got a lot of cool delicious recipes that you're gonna want to you know try out and add to your meal plan so look how beautiful that is that's the business remember this you can give it a fit love life eating tasty food is a real thing subscribe and don't forget to like the video alright to the next one you .
Video Description:
Once in awhile you need a special treat, but that doesn't mean you have to compromise on your diet. If you're gluten free or Paleo, this healthy chicken nugget recipe is soul satisfying but substitutes tapioca flour for the typical white flour breading.
Like I say in the video, this healthy chicken nugget recipe will only turn out right if you get the oil really hot before you start cooking. If the oil isn't warm enough, it will absorb into your tapioca flour instead of frying it.
The ketchup I mention toward the end is from Primal Kitchen. It's unsweetened and you can add some hot sauce if you want a little kick!
Healthy Chicken Nugget Recipe (Paleo and Gluten Free)
Ingredients:
2 lbs Boneless Skinless Chicken Breasts cut into bite-size pieces 1 tbsp salt 1 tbsp oregano 1 tbsp onion powder 2 tsp course pepper 1 tbsp garlic powder 3 eggs scrambled 1 cup tapioca flour Avocado oil for frying Instructions
Directions:
Cut chicken breast into small, bite-size pieces. Season chicken with seasoning, salt, and pepper.
Place tapioca flour in a shallow dish or pie plate.
Scramble eggs and mix in with chicken.
Heat 2 to 3 inches of coconut oil in a deep skillet over medium-high heat. Using a thermometer, watch for it to reach 350 degrees. If you don’t have a thermometer, put a little of the flour in the skillet and if it sizzles, then it’s hot enough.
Coat chicken in flour and place chicken in hot avocado oil.
Cooking in batches, cook several chicken pieces at a time. Cook for 2 to 3 minutes, turning once. The chicken should be golden brown when it's done, but it won't be as deep of a color as if you were using regular flour.
Place chicken on a paper towel-lined plate or rack to drain excess oil. Repeat with the remaining chicken.
DRUNKEN CHICKEN ZOODLE CASSEROLE takes a spin on the original Pad kee mao Asian stir fry and puts it in casserole form. A paleo friendly zucchini noodle casserole with tons of flavor, Thai spices, and simple healthy ingredients! A delicious, light, high protein, low carb recipe
These delicious Paleo Chicken Fingers are sticky and sweet with just the right amount of spice. They're a quick and easy, healthy dinner recipe your whole family will LOVE!
My time-lapse step by step process for cooking my Chicken and Veggies Paleo soup.
I am by no means a professional chef, but this is definitely my go to soup for the cold nights, and to help recover from the sniffles.
The ingredients are: Chicken thighs (quarter size cuts), half large white onion, carrots, zucchini, celery, tomatoes, green onions, cilantro, and 4 cloves of garlic.
Lettuce wraps filled with spicy taco-spiced chicken, avocado, tomato, and drizzled with a zesty cilantro lime sauce. This healthy nutritious low-carb meal is a delicious protein packed option and great if you are on a low-carb, paleo or keto diet!
If you’ve been following our website and Facebook page for a while, you know just how awesome the Paleo diet can be. One way to make it even better is to have a plethora of delicious recipes at your fingertips, ones with mouth-watering pictures and easy instructions. Now there’s a collection of Paleo recipes from the folks over at Paleo Grubs that is catching on in a big way. The Paleo Grubs Book contains over 470 Paleo recipes so you’ll never wonder what to make. Click here to download the Paleo Grubs Book
now that we're warmed up alright counting Jackson back in the house number tail and we crush it we're going to make a meal that's so good you'll want to lick your finger come right back for some paleo chicken finger yeah v paleo alright so we got this concept of of what I like you know complete meal is a kind of meat potatoes and soft and we need some good yep protein carbs and hourly fat with sauce frozen conscience ah so we're going to go with we've got some pretty cookie em that'll be our carbs proteins are going to be like a braised style Mexican super awesome things and then we'll just work together quick sauce again okay so go sounds great alright so here we got our crock pot when you keep it super simple we've got four piles of chicken breast already in here you think taken aback big chicken breast go ahead put these two carrots you can kind of tuck these in your kiddies break them to see what kind of getup no dicen yeah we don't have to do it cut up so it's kind of nice for what this one I can't break that yeah that's fine set that guy in there okay and then onion let's go with this guy you get into that one for me just loosens it skin off and cut it in half do I start with a cutting and a half I know you have like a technique minor that's exactly what I was going to do so you cut it that way then it's a little bit easier to peel and then sets you up if you are going to cut it but the way that you were going to do it with a work totally strike is all we're gonna do is cook this baby hopefully nice throwing it in there so so we got that if you want to peel that second half we're going to use that in a little bit give me a nice healthy pinch of salt kind of spit over here one more of those live hinges are smaller than your school my pincers are smaller that's right all good and then a little sensitive cilantro okay now water go ahead if you want to grab that one other right the poor water in here it's kind of like a chicken stock chicken broth room for shredded chicken covering it up right about a little bit more sometimes I can move it about there how much is less we have 40 ounces of water we're going to put this on low for 12 hours and let her rip okay magically boom we've got our chickens up yeah let's get the carrot looks cooked I'm going to cook through translucent onion like we're talking about okay we're to pull these out and then we're going to shred them a little bit warm it's a little bit warm but all we're going to do right now is just shred this up so that everything looks this is really good Kelly's doing great looks kind of like that all the chickens shredded we got a pan preheat it over here on lap Kelly show us her saute still in a second I'm going to go ahead and give a skew the oil into that pan we're a julienne 1 and 1/2 onion go ahead and start that in there if you're doing a little pinch of salt in it get yourself another how about it we're all happy well this is just some granulated garlic we'll go one teaspoon and that's Capote Lake how do you have to regulate your heat with this one all right it's pretty hot pretty fast so we'll just start with that that looks good or well now again okay okay now we're going to add our chicken hold it right in there you want to kind of put a full those onions in or out up and then I'm going to use some of our bra stock whatever you want to call it consuming to add the bra it kind of opens up that chili and Express that Colorado let me send yeah even I want you to go there and then crops also I'm going to work that at the state pie tomato puree bring in some of our block again and whisk this off would you pull a in here we go to fit this bowl well guys there it is super simple chickens done salsas ready we're going to grab our yeah you want plate this up all right Kelly good job on the plate up thank you awesome we played it up as you might be it immediately and then here kind of for meal prep standpoint Kelly Jackson in the house the awesome job Octavio Nick this has been our chipotle chicken Tinga and as always we're here helping you keep it a video .
Video Description:
Nick and Kelley are kickin' it down with this finger lickin' slow cooker meal in the Paleo kitchen. See just how easy it is to make this delicious dish at home yourself.
This meal can also be ordered as one of our Ice Age Meal options.
hey this is Trish and I am in the kitchen today and I wanted to show you how to make bone broth it's a really popular thing going on right now the thing is is that bone broth is actually just like beef stock or pig stock or chicken stock whatever you have on hand and meaty marrow filled bones you could make this bone broth out of today I'm using oxtail and so I just want to show you a little bit about the process because when I was sick I was actually too sick to make me some bone bras but now that I'm doing better I'm making bone broth and I wanted to just show you how to do it so I hope you enjoy stick around ok so I've already started the process because I just wanted to show you the midway point of the first part of this process of making bone broth so let me turn the camera around here we go and you will see all this yumminess right here this is oxtail you'll see those bone filled marrow bits there in the center and you'll also see parsnips that's the white bits you see carrots I have onions I have celery I have some garlic over here not sure if you're seeing that in the camera and and what I'm doing is I'm roasting all of that all I did was put on a little bit of a little bit of salt and pepper and some extra virgin olive oil um I'm not a big fan of olive oil I don't know what the big deal is personally I don't like the taste I'm from the south you see and we don't grow up eating olive oil because olives are not native here we we cook in lard lard grows here right now I'm kidding you know where Lord comes from right well if you're vegetarian you don't want to eat that um but but I have coconut oil I didn't feel like melting coconut oil so I just used some olive oil so what that is is that's the the bones themselves this is two pounds Ashley's about three pounds of oxtail so you see it has really great layer of fat it has a lot of meat on there and then of course the marrow there in the middle of the bones and a little salt and pepper sea salt of coarse sea salt I love that black pepper and olive oil you smoosh it all around and put it in an in on 450 degrees Fahrenheit no idea what that is in Celsius sorry to my friends in Australia but 450 Fahrenheit and let that cook for about 20 minutes which I've just done and then you're going to flip it and that's what I'm about to do I'm not to flip the meat over I want to get that I'm going to get those at the fat part of the meat i want to get those on touching the bottom of the pan so they get really great yummy browning juicy roasty flavors and more that are so so very good so I'm going to do that I'm going to stir the vegetables up and you don't want is left a lot of veggies in there that's because and you'll find this if you do this you get to this point when you pull it out after the second time because I'm about to do it for another 20 minutes in the 450 degree oven those vegetables are so delicious that you start eating them and then you're like wait a minute now I don't have enough for making the actual stock or the broth or whatever the next process is and so I just make some extra so that I can eat them while I'm doing the other part of the bone broth so all right so I'm gonna flip these over put them back in the oven for 20 minutes and then we'll do the next step ok so this sucker I just pulled him out of the oven and he looks gorgeous let me show you what he looks like okay so do you see all of these brown bits and you see this right here I mean every one of the tongs you see all this gorgeousness in here this is all flavor you see that all the way down here in the pan yummy yummy yummy yummy yummy look at that Brown I think it's called the my yard reaction or something like that so yeah so you see my beautiful garlic over here in the side oh he's beautiful ah so now the next step I'm gonna have to put you down in order to do this but the next step is I'm going to transfer all of this to my pot and and then i'll talk to you about the next step in the ingredients that go in ok so do you hear that you hear that sizzle that's because I've got my pot already hot this is a nice-sized stockpot I wish I had a bigger one so now i'm just adding in all the meat so I'm just transferring it at a time over here looking a little bit extra brown on it then I'll start to move over some of the veggies so you see this this is a post it now parsnips are root vegetables and what you're looking for when you took pcs if I can get this in the right angle do you see all that you you see that isn't that gorgeous you would not know how divine this tastes so I'm going to leave them over to the side so I could eat them thank you very much and then you can see the carrots you see this gorgeous color on the carrots believe it or not this is not ruined this is perfect so that Kerris I've got the onions I'm just moving everything over you know the cool thing is is that carrots this orange color look at that ok I'm going to put him to the side I'm going to eat him I should have got the plate anyway yeah so carrots are actually his orange color is actually a modern hybridization in medieval times carrots were white in fact if you look at medieval paintings of farmers market or you know the center of town scenes that kind of thing where they you have farmers selling their crops carrots are white so all of these in here and what I'm going to do is I'm going to keep doing this I'm going to keep my girl look out I'm going to take out a few of these clothes that are now roasted I'm not going to put them in here as well okay so here's what's happened now this this pot was so hot I had to go ahead and put in the water I wanted to show you the ingredients that are going in now but um the water barely needed to go with because it was sizzling remember that sizzle you heard that meat was cooking a little too hot and quickly so i had to go ahead and put in the water but let me show you what's happening here everything is bubbling away over here i have the apple cider vinegar i'm going to do 2 tablespoons of apple cider vinegar 2 tablespoons of Worcestershire sauce 2 tablespoons of a black pepper cool um that's what the peppercorns and normally I would do two bay leaves but this is a big bay leaf it's from across the street so it's not store-bought so these just you know grow wild actually been a Laurel as a protected tree here and so this is what i'm going to use and so i'm just going to put him in there you see I've already emptied out the garlic cloves they got nice and toasty roasty and so you know put the garlic in there it's a lot more mild it's a it's a much more smooth flavor than eating just the pungent paint pungent flavor of raw garlic and so yeah for those of you who like my skull here he is he's right there like my skull knife block and in case you're wondering what this is these are sweet potatoes that I have allowed to sprout and I'm going to plant these because these guys will make absolutely gorgeous greenery out front by my front door you just plant let your sweet potatoes go to sprouting like that and then you can plant them and maybe a few weeks after you plant them suddenly it's like they grow two or three feet long overnight and they have these most vibrant bright green leaves you've ever seen and they're gorgeous so it's really inexpensive way to have some nice plants and greenery out by your front door so that's what I'm doing that and you see my bananas over here I can't stand bananas but I eat one I try to eat a banana every day but I usually eat them when they're still just a little bit green because they taste the least banana II at that point but what I'm doing is I'm I've allowed these bananas to kind of get ripe really right because i have read that the brown spot like the more brown spots you have on the banana there's a chemical change happening in the banana and that chemical change that chemical that's being produced is actually really good for the immune system and so of course i can't think of what that is right now but you know google it and let me know what you find so i'm letting these go and we call these drafts the draft bananas you see that how they're kind of brown we call those giraffe bananas here in this house and and so you can see this is bubbling bubbling away and so now this is just wait sit and wait sit and wait sit and wait smell all this gorgeous gorgeous food and this is actually going to cook for about 24 hours now I don't have a crock pot and I do not want to let this cook overnight so I'm going to let this cook for about seven hours seven eight hours I'm going to let it cool for about an hour on the stove and then I'll put it in the fridge and then I'll just resume cooking it tomorrow because you want to cook this about 24 hours now the next step is actually in about two hours from now I'm going to take the meat out because the meat will be tender and falling off the bones at that point and I'm going to eat it because I'll be hungry and you can see over here my kitchen a little bit of a mess right now but you can see my yummy yummy food right there you see that all those gorgeous colors yes yum yum and and so those are going to be really delicious i'm gonna go ahead and eat those because i'm very very hungry and i will just keep cooking so the ginn this is going to cook for a couple of hours then i'll take the meat off the bone but i'm going to leave all the fat you want that fat because what we're doing with the bone broth is we're getting the collagen and we're in the fattest flavor then the bones are the college in the out of the marrow the protein and all those yummy brown vegetables um flavor yes indeed they're me gorgeous and delicious and this is that this is the hard part the waiting but see I was smart I made extra vegetables so I don't have to actually wait a long time I can go ahead and eat some right now all right so I'm gonna see if I can wait and a couple hours and show you what it looks like when you're pulling the meat off the bone okay alright see you then bite ok and so here I wanted to mention something really quickly and that is a little bit of a controversy over the protein scum that rises to the top while you're cooking it in case you've never seen that here's what it looks like you see that it's this kind of frothy white protein scum that rises to the top now some people say oh you absolutely have to get rid of it some people say it doesn't matter i'm in that I don't care camp on this I think that you know taking the this that pond scum of the top is really just because um you know fancy chef type people want to make brats or customize that are really clear and this pond scum you know whatever the proteins gaun gana again cloud up your broth again personally I don't care and since it is protein the whole point of this is because i want the protein i want the collagen and you know protein you can change the amino acids which is building blocks of life so why would i get rid of that um so I'm going to keep it i'm just gonna stir it i have my handy-dandy wiki spoon under if you see to see my witchy my witchy yes yes yes yes my Richie apron you see my witchy stuff is my little bitchy up there she she keeps my kitchen safe for me and so anyway so all I'm gonna do with that pond scum I'm gonna start it right back in and I'm going to keep doing that but of course if you want to get rid of it you can um you may find it if maybe it flavors the the broth in a way you don't like or maybe you just don't care either again I mean I don't care camp and I'm still not feeling well so I really really really don't care but I did want to mention it just in case you noticed it and you wanted to know what to do about that frothy mess on top of your bone broth okay it so here we are on day two of the making bone broth and I just want to show you what it looks like over overnight because what I did again because I don't want to keep this on the stove or even in the oven overnight I had to reduce it so that I could put it in the fridge now what I did was I reduce it way down why because it cools off more quickly so that I could get it in the fridge so that I could get a little bit of sleep so here's what it looks like you see that see that delicious layer of saturated fat there on the top and yes I am absolutely keeping that that's not going anywhere how dare you even suggest that you take that bad off it's delicious so there it is now watch what happens okay so what I'm going to do is I'm going to take my handy dandy spoon and I'm just going to cut through this just so you can see this is the broth this is what the broth looks like over night okay and so all I did hit was just I just flip this over and you can see you can see it really is like jello of course the word jello comes from gelatin because you know gelatin collagen comes from the the marrow of the bone that's why a lot of vegetarians will not see there's one of those right there one of the ox tail bones a lot of vegetarians will not eat jell-o because it is derived from animal product like right there so they go toward plant sources of gelatin so start to see some steam coming off the top there then what I'll do is I'll just add in some water and just get it going again okay so while this is doing its bubble bubble toil and trouble thing over there behind me you may be asking yourself why would you even bother to go to all this trouble well if you if you're like me and you can't or don't want to buy processed foods you have to cook this way you have to cook at home or at least have a local source of food and/or food that you can buy locally that you know is healthy for you one of the reasons that I cannot stand to buy store-bought broth is because of the amount of sodium in it sometimes it has caramel coloring to make a little more brown because they didn't roast the vegetables first but the sodium is the big thing I mean in one serving you Oh serving as a cup let me show you what a cup looks like i'm going to get my get my measuring cup out there this is this is one cup one little bitty cup it has like 960 milligrams of sodium the problem with that is that the body only needs about three grams of sodium on a daily basis so when you have even just one cup of soup or one cup of broth or one cup of stew or one cup of anything that's made with the store-bought stuff I mean you're using nearly one-third of your daily requirement for sodium and on top of that you can't source the sodium because they just say salt what kind of salt was it iodized salt probably i don't use iodized salt I don't want because it's a refined salt I use sea salt and so you know one cup has 960 milligrams it's the only one gram of sodium and so you know when you want to cook with things cook with the broth you look like my daughter wants me to make shepherd's pie I use broth for that I want to make gumbo i use broth for that chicken and dumplings i use broth for that you get the idea yeah and so being able to do this kind of thing with my own bra that I can source every single ingredient I know exactly what's in it um it just makes me feel better you know and I don't know why these companies you have to salt everything so much I'm simply well aside from the fact that Americans are now so accustomed assault but you know broth is supposed to be a starting point it's a foundation to a dish it's not the dish itself but I think a lot of people use store-bought broth they just maybe add the water to it you or like a bullion q where some of those concentrated broth a mix or new stuff I'm still sick I can't think but you know then they add water to it and they just heat it up in the microwave and they eat it like that is soup that's not what broth is supposed to be broth is a foundation that you then add other flavors and layers too but I think that's why they add so much sodium is that people just try and use it as soup itself and that is not what it's supposed to be so anyway I just wanted to talk you see that back there it's getting ready so I've got to go ad the water to hold on all right so there we go you can see it's bubbling and it's come back and it smells absolutely divine you can smell the roasted vegetables you can smell you can smell the peppercorns you can smell the sharpness of the Worcestershire sauce and the apple cider vinegar you can even smell the different vegetables that carries the parsnips even get a set of some celery in there it's absolutely wonderful so now I'm doing to do is wait for this to boil bubble toil and trouble once again so let me put the top on and he'll get to cooking and we'll be back okay so I added a little more water that measuring cup that I just put in there that's eight cups I've added another four and i'll add another four and i'll just keep adding and topping this off the goal here is to get at least I'm trying to get at least three or four quarts of bone broth out of this the whole idea behind the paleo trend of with bone broth is that you drink a cup of it every day because you want the collagen you want a protein and you want all the other great little vitamins and minerals that have seeped into the bone broth through the cooking process and so you know i'm i'm gonna have to do this again the first thing I knew I need to get crock pot and I'm I've been sourcing a quart crock pots because I need to try and get a lot of bone broth when you go to this much effort yet you want to get as much as you can now honestly if I had a crock-pot this would be a lot simpler all you would do is just roast the vegetables like I showed you and you put in a crock-pot and you let it cook overnight 24 hours up to 48 hours even and that would be your bone broth and you'd be done but because I don't have it I have to do this and because I know a lot of I know a lot of men out there who want to try and be healthy but they don't have a crock pot either so we're in the same boat so that's why I'm showing you how to do this and but pot would make it a lot easier but until then we're doing a stove top so it's a it's going now it's going to get up to the boil I'm going to just keep doing that process of adding water let it reduce adding water let it reduce adding water let it reduce because every time you reduce it you're concentrating the flavor and so that's what I want I want some really really delicious nutrient filled broth by the time we're done with this at about midnight tonight so I'm going to check on this and then I will check back in later okay so this stuff is finally done and let me show you what I did and try and explain it as I go along because basically what I did was like I said I reduced it down just to make it easier for me to strain it and then I have put it in jars so let me show you what that looks like okay so there is the bone broth you can see all the jars of bone out that I have basically what i did was i first had to strain this stuff and I started that by taking out all of the vegetables look at that I mean you can see these vegetables are planes spent there is there is nothing left to these guys although technically you could still eat them a little bit of fat and stuff right there there's a little bit of meat in here you could beat that if you wanted to but the fat of course if you have a dog or a cat they would love all of this you just want to double make sure that there are no peppercorns although the peppercorns really are kind of soft at this point just make sure there no peppercorns in there and of course you want to make sure there are no bone shards because here the bones now the bones as you can see these bones are spent too I mean even the meat that was on there it is it has fallen off then your little bits when you plug off the meat a little celery and you'll you can just tell these bones they're pretty much done but when again it you can give these to your animals too but again just be careful like I would not give this kind of piece i would not give this to my dog is too small especially a big dog because they tend to not chew they just swallow their food you know things wolf it down and but yeah just looking around I mean these bones are just about done so you're going to see these bone in caps there they look like little little kneecaps that come off the ends of the bones so just be careful when you if you want to give these to your to your dog just be careful i would give them the actual vertebrae the bones themselves and not these little extra patella looking bits right there so yeah so these are all spent so let me close up the tongs basically what i did was i reduced it down like i said and then i put it into a clean pot and then i added water to fill it up to the line and filling it up to the line then I just started together to incorporate the broth after you this was after I strained it and then I used a funnel to help put the bone broth into the jars I was hoping to get several courts and I did as you can see the these are court mason jars here this is almost a court I think maybe it is a court with almost a court for sure and then these are spaghetti jars back here and then these are my coconut oil jars so I saved my jars and try to recycle them in the hopes of doing some canning and that types of thing that type of thing so yeah so as you can see you can see there's some fat saturated fat that's kind of ray the rising up here to the top it's late sorry brain is tired and the fat is rising to the top you see there's not a whole lot of fat I did not deaf at this so considering we started with olive oil and you know we have all this fat you can see that's left over there actually is not going to be a lot of fat in this bone broth but the fact that is there it's going to taste awesome so now what I'm doing you can see I have the tops off the tops are waiting I'm letting these cool here and and then they will once they're a little bit cooler then I'll put the tops on and I will put them in the fridge and I will put them in the freezer now you see these little jars here these again these are my coconut oil jars right here these are about two cups so um the reason why I did these is because I know when I'm cooking this is two cups so if I'm only doing a small amount of soup let's say for my daughter and me this is two cups and all I do is just I'll just pour that in and use it the courts then are of course a court each and i will use those when i'm making larger amounts of a dish like you know like a gumbo a soup an irish stew of course that's what my daughter really wants she wants shepherd's pie and she wants Irish stew so there you go so this of course you can throw all of this out the vegetables are done the bones you can give to your dog not the end caps and then just these are cooling off and then I will jar these let me show you what this looks like we just show you this there's an absolutely gorgeous color and you may notice some sediment after its had time to sit but this has been sitting here for oh no maybe 10 or 15 minutes and it's still gorgeous and it is done the tops are on the jars and they're ready to go in the fridge and the freezer now I swear this is not a difficult process it's just a long process and it's made a little bit longer because again I don't have a crock pot I'm doing this on the stove but it's really just roast the meat and vegetables boil that sucker for 24 hours strain it bottle it jar it and that's really all there is to it I swear again it just seems like a long process well it is a long process but it's just it's not hard you can see my guys right there on the counter see them gorgeous looking fabulous and and so some of these i will put in the fridge the mason jars the quart jars i think i'll go ahead and put those in the freezer i know they can go in the freezer now if you actually have the tools and the equipment to can do canning you should absolutely no do these in a proper canning method so that they can last a lot longer but i know this is going to go really quickly here and and then to is like okay well that's a lot of work for something that's only gonna last a week or maybe two weeks at the most but I i am i am i am comforted in the fact that i know exactly what's in it I know how it was prepared I know there's not too much salt I know that the ingredients are are good and I know most of all I know it's made with love and and so that really is one of the most important things for me so I am going to go because this video this whole entire video I'm sure is going to be 20 25 minutes but but I hope that it's helped you and you know if you make your own bone broth please leave a message down below so that I can hear how it happened how it went for you because you might have some tips that will help me and they'll help everybody else so all right long day I am ending this and I love you and I will see you tomorrow bye .
Video Description:
September 17, 2015: Two days in the making, here's my how-to for making bone broth on the stove (sans crock pot/slow cooker). Enjoy! ~ trish
you've got a chicken breast on the board and we're going back to the first restaurant I worked at Paesanos this is going to be chicken and mushroom arrabbiata and v paleo our chicken breasts we're going to cut off the rib meat here it's going to clean it up a little bit I don't mind this stuff but usually like proper form would be to do that here we'll give this guy a rough dice and then across this way and this one we're going to say is maybe a meal for two or I to smaller portions a pretty big chicken breast so we got that done oil and a preheated skillet here Greek freak boom this is like my Mediterranean Italian Greek type blend rosemary basil oregano garlic salt pepper all that good stuff mix that up I'm going to add a little bit more salt look at that gold I next up fresh garlic I'm going to go with two large cloves might end up being three two in here he has one little one one medium-sized one but somewhere around that range check on our chicken here oh good hot pan you can see we got some caramelize a ssin going a little bit there they like that that's what we're looking for all the way around garlic going to rub my knife through this roughly chopped and get that in the pan a little more olive oil to help it next up one zucchini there we go down the middle like that we're going to flesh it out a little bit right here just taking that excess moisture out of the middle and then to help keep things crunchy and I wouldn't say dry but just not like kind of stopping overly wet with me and these I'm going to go straight across they're going in the pan go a red bell pepper neck chandelier cut right no seeds on the board not even one one yeah there was one right there get the pepper in chickens coming along you guys right here textbook beautiful right here guys carmelization the herbs are seared right into the crust you get a lot of flavor from them the more salt and then some shrooms will go where you go for and for these are like cremini or brown cap mushrooms all right screams going in and then where's the other Robbie ought to come in the spice right the heat so we'll give that some red chilies right now a couple pinches of those and little one more and then some water kind of help it along we're going to let that cook you have to come back in here on mushrooms just paste it one great need a little bit of salt so I added that now we're just waiting for this moisture to reduce and then we'll be ready to plate I think the chickens just about there on the board I've got some Italian flat-leaf parsley and all I do here is go through and pick the leaves from the stem the stems here are pretty woody so I do a little bit better job than I would I don't know what basil or definitely cilantro come on try to chop the stems up right with it then we'll run the knife through this parsley something like that it's a rough chop I'm going to zest the lemon and then this guy nice and tender I'm gonna juice top of this in give us a little acidity mix well with our heat let's get half of that in here boom cut the heat ha ha with time to play so here we are an Italian meal fit for a king or perhaps two princes right one large meal or two small ones I do a pretty zone balanced paleo ingredients smells great tastes great a little bit of heat some acidity from the lemon some freshness from the parsley this meals tough to beat get out there you guys get in the kitchen have some fun with this and at all times do your best keep it paleo .
Video Description:
On the heels of National Pasta Day, Nick shares a super simple Paleo Preparation that is the offspring of one of the first meals he learned to cook. While there's no pasta involved, he's got red chile flakes and a stash of Greek Freak to create a flavor you won't soon forget. Tune in, turn it up and say "Basta" with the pasta...
everybody it's dan from primal full life and today we are making a bruschetta chicken on almond paleo bread it's going to be a delicious dinner right here and we started off with the bruschetta we made this before with some heirloom tomatoes we have some basil leaves we have garlic cloves some extra virgin olive oil in there as well as a little balsamic vinegar and some sea salt we used actually the some food superfoods find Himalayan crystal salt very tasty nutritious and unlike regular table salt it actually is good for you instead of being detrimental to your health so we got that and then with our chicken we have some chicken breasts right here and we use the juice and zest from one lemon we have some one garlic clove minced and believe there was some fresh basil some olive oil and we also used more that Himalayan salt and pepper to taste and we just marinated that for about half an hour and then we're grilling it and we are going to have that with the almond paleo bread right there comes from Julian bakery in their paleo section or you can check out paleo bread calm it is low in carbs low in Cal's has fiber to keep you fuller longer and satiated a little protein in there and it's made from all natural ingredients along with being GMO free gluten free grain free soy free everything free but it is just awesome and I love grilling it up I like getting an extra crispy on the grill a little extra flavor and the newer version is a little softer more like real the bread that were used to so if you haven't tried it recently or ordered up recently make sure you do so you can see how it compares to the older version I kind of like it a little bit more all right so we'll be right back shortly to assemble this beautiful sandwich all right stay tuned okay so here's our sandwich all assembled it looks great it smells great and I just gave the bruschetta of my sample and a taste awesome so I cannot wait to try this out with my almond paleo bread from Julian bakery calm and i also have a couple chocolate mint zero cookies from Julian bakery as well these are stars free sugar-free gluten-free the zero net carbs and they taste great my daughter loves these cookies so hey why not so make sure you go to Julian bakery calm / paleo for the paleo bread the Himalayan salt that we used in this recipe and while you're on their site look for those chocolate mint cookies all right folks so this is dan from primal for a life and I hope you have a great day .
Video Description:
Bruschetta And Chicken On Paleo Bread http://www.julianbakery.com/bruschetta-chicken-on-paleo-bread/
so today I'm going to show you how to make cajun prawns or shrimp with a cauliflower rice and this can be suited to a paleo primal or a dr. poon low-carb type diet talk about my ingredients assembled here we'll just step in the back here we need a little bit of olive oil for frying maybe one or two tablespoons I've got some lime juice you're going to need about 1 or 2 tablespoons of that as well you can use say a quarter to a half cup of chicken stock low-sodium but i'm using this is actually a kind of a concentrated stock you're meant to mix this with water but i'm just going to use this little thing as it is so that's less liquid in the dish you do it whatever way you prefer if you like more breath we've got cajun sees no much money is about a tablespoon off and grated fresh ginger which I'll use probably about a half a tablespoon to maybe a full tablespoon of got um a good handful here of salted cashews um you can trap them or leave them whole it's up to you how you prefer it to be in there got a half a head of cauliflower which we're going to chop very thinly to make it sort of resemble rice one green capsicum or pepper zucchini and four to six green onions depending on the size he's a pretty good size soak up four of them and then here I've got 200 grams of prawns or shrimp that are already cooked so first we're going to take your half a head of cauliflower and we're going to just sort of turn it into something resembling rice it's going to be a stand-in for the rice so it's low carb there's a number of ways you can do this you can use an actual grader and just rub it across that you can put it in a food processor I'm just fine for a smaller one especially the quickest easiest way is just slice it very thinly like this so once you've got those thin slices then I just take the knife and just go back over it a little bit in every direction until it's about as small as you want it to be it doesn't have to be exactly the side of the race you just want an icee song there's my cauliflower chopped and you can see it's fairly small you can go as small as you want i guess that you can make it resemble rice you don't have to it's up to you all right so then we're just going to cut up our capsicum I like to cut it rather big chunks again you do what suits you if I need you to cut both ends off around the inside quickly there you go now I'm just going to cut it in rather big chunks because that's how I like it you do this however you want you can cut it in rounds and then chop them in half or quarters and dice it you can do whatever you like I like to have sort of angled pieces and then what I'll do is stack them just go and once through the more like that you kind of end up with sort of narrow strips of it okay then the last thing was the green onions our show lots of spring onions whatever you call them I've just chop them up small so I'm going to take these three not the cauliflower just yet but the green pepper capsicum the zucchini and the onion and they're going to go into a large frying pan that we've had preheating with about a tablespoon or two of oil and as you can see one ends there what with the oil in it already so now I'm just going to add all these veggies like is everything but the cauliflower so the onions will go in the zucchini and your green capsicum her bell pepper just gonna stir those and sauté for you so let's start to get tender you want that capsicum to be a little bit tender to the bite this wouldn't hang soon just about five minutes now they're not soft you don't want them soft but would the green pepper the capsicum you when i'm just starting to get a little tender to the right position in the cooking that's ready now to add our front oh and the tablespoon of Cajun seasoning we're going to stir that through together hey that's an one for just about a minute this point I'm going to add my chicken stop now if you're using a liquid like a quarter to a half cop as long as mentioned that's probably enough I'm going to add just a fun little couple of the water to this to get some liquid in the pan there that around just a bit and then we're going to add in the cauliflower tablespoon of ginger and the cashews okay and their cashews that's what I'm going to stir cook and stir on medium you want to saute are simmering you don't want it too high for roughly five minutes or so you want that cauliflower to get tender okay I did end up covering it just for the last few minutes so I didn't have to add any more liquid that will help keep the moisture in there I didn't want too much liquid in it so that's been just about five minutes I've been stirring it part of it and the cauliflower is tender enough for now so I'm just going to turn that off and remove it from Keith as a last step is just to certain about two tablespoons of lime juice stir that all through that's ready to serve okay so there it is served up on the plate give it a try it's really nice and tasty enjoy .
Video Description:
This recipe was inspired by the blog Primal Journey but has been modified to suit the Dr Poon Metabolic Diet. I also left out the coriander (cilantro) called for in the original recipe because I don't care for it. You can find her original recipe here, but it doesn't give quantities for everything.
CAJUN PRAWNS WITH CAULIFLOWER RICE Makes two good size serves
1-2 Tbsp olive oil for frying 1 zucchini, cut in chunks 1 green capsicum (bell pepper), cut in chunks 4-6 green onions, chopped 1/4 c low-sodium chicken stock or use concentrated stock with a bit of water for more flavour 1/2 head cauliflower 1Tbsp Cajun seasoning 200g (7 oz) cooked prawns (shrimp) 1 Tbsp grated ginger Small handful salted cashews 1-1/2 Tbsp lime juice
Heat oil in a large frying pan and sauté zucchini, capsicum and green onions Meanwhile slice your cauliflower very thinly then chop finely (or pulse in your food processor) until it resembles 'rice' Once veggies are tender add Cajun seasoning and prawns and cook for a minute or two. Add chicken stock, cauliflower, ginger and cashews and cook for about five minutes, covering to retain moisture but stirring often. Remove from the heat and stir in fresh lime juice and serve
Delicious! Visit and Like us on Facebook: https://www.facebook.com/Annas-Kitchen-1686376324950749/